Setting Up Your Investor Page
Step 1 — Configure DNS
Section titled “Step 1 — Configure DNS”Before activating your Investor Page, you need to configure your DNS settings. Create a CNAME record named shares pointing to:
e8570123ff0e7d19.vercel-dns-016.comExample: shares.yourdomain.com
This hosts your Investor Page under your own domain and is a prerequisite for enabling share sales and trading. For detailed instructions, see the DNS configuration guide.
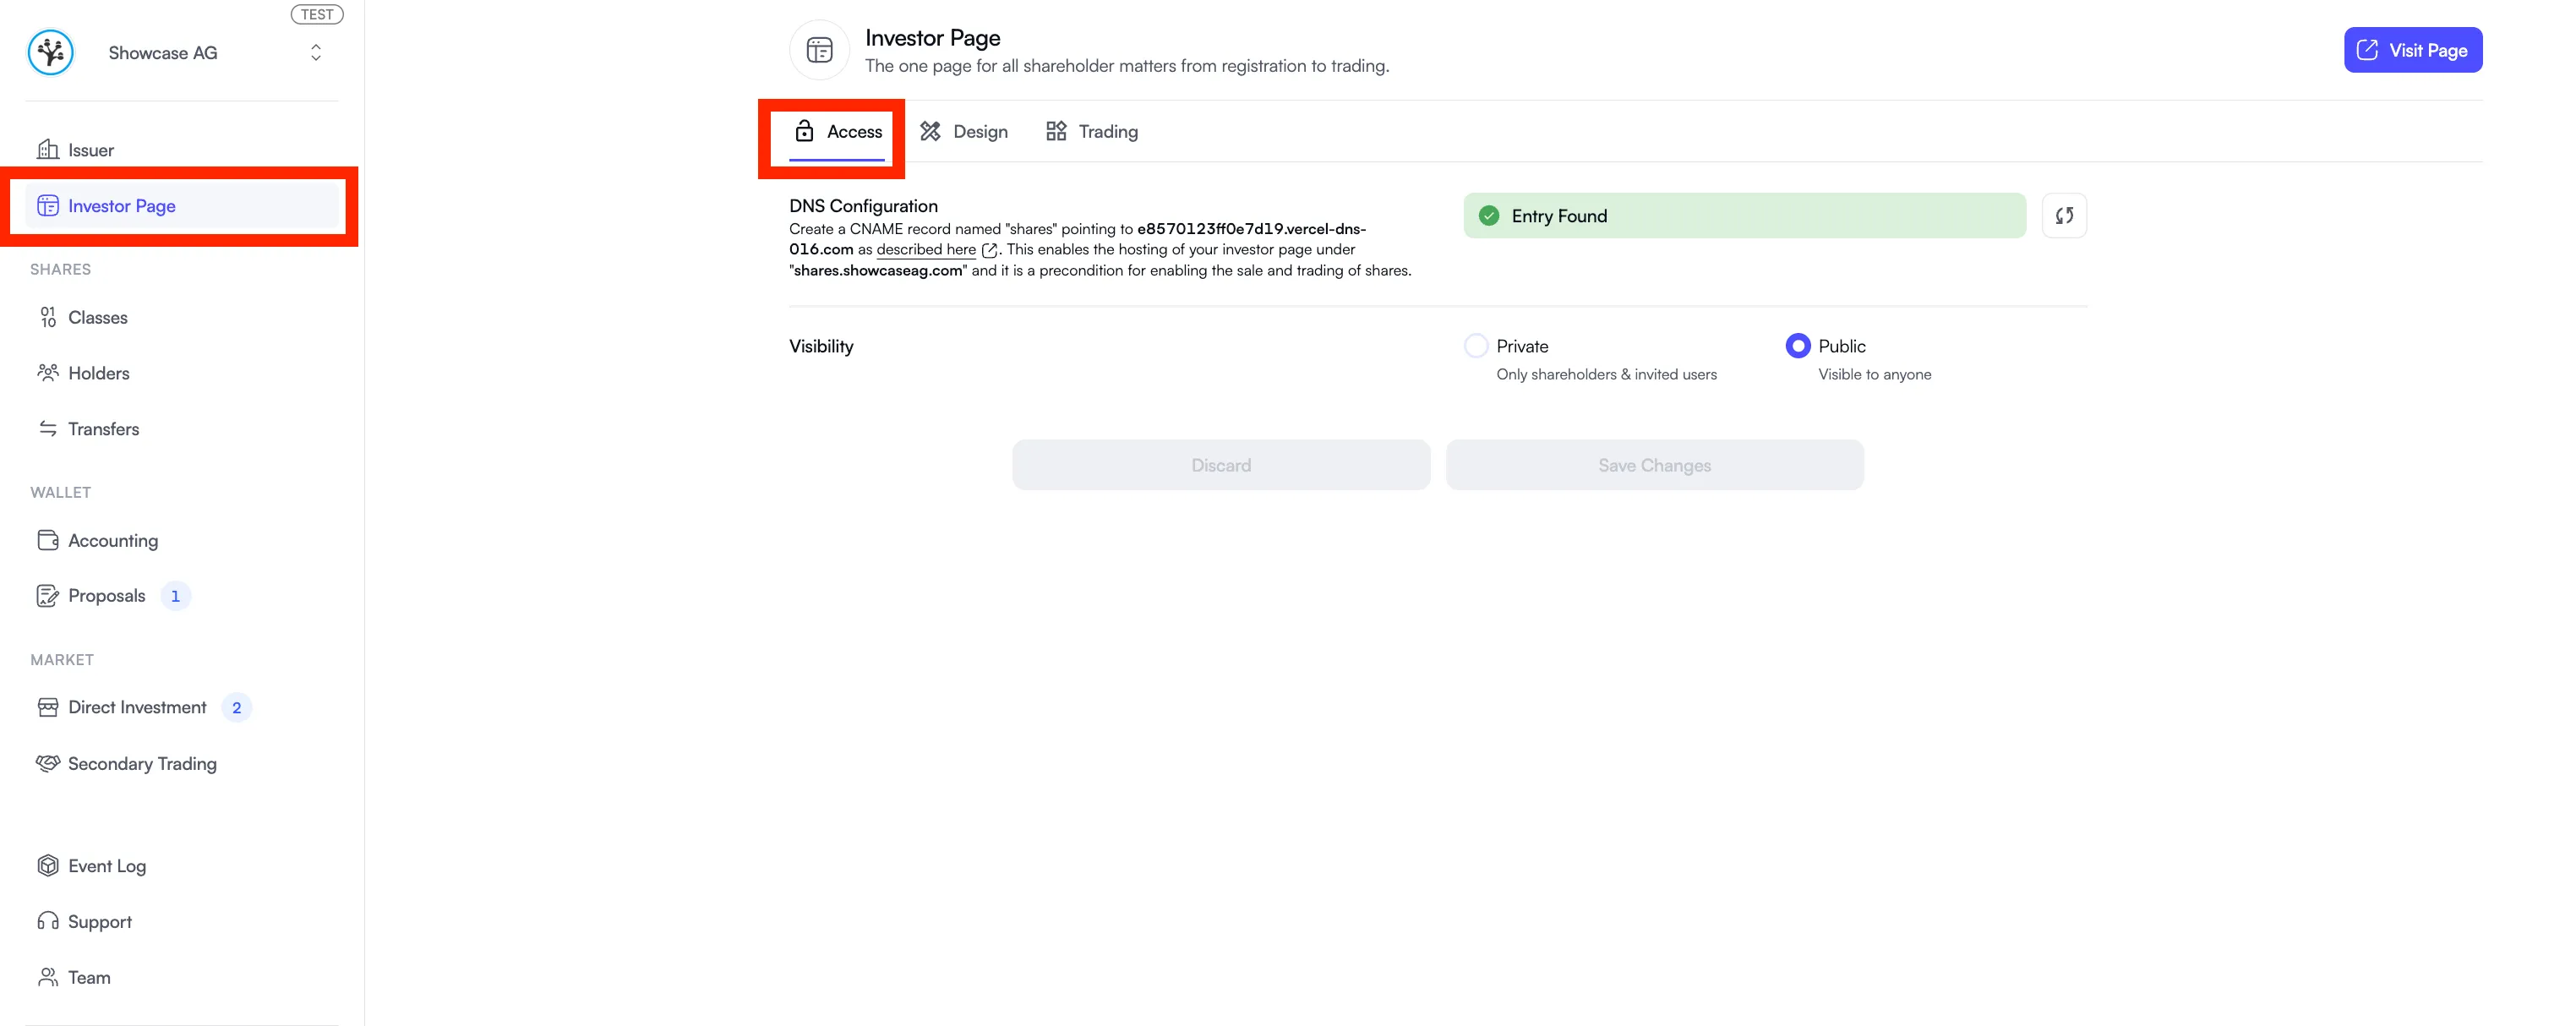
Step 2 — Verify DNS and Set Visibility
Section titled “Step 2 — Verify DNS and Set Visibility”Once DNS is configured, open the “Investor Page” tab in the Issuer Portal to confirm the DNS record has been detected.
You can then choose the visibility of your Investor Page:
- Public — accessible to anyone with the link
- Private — investors must be granted access before they can view the page
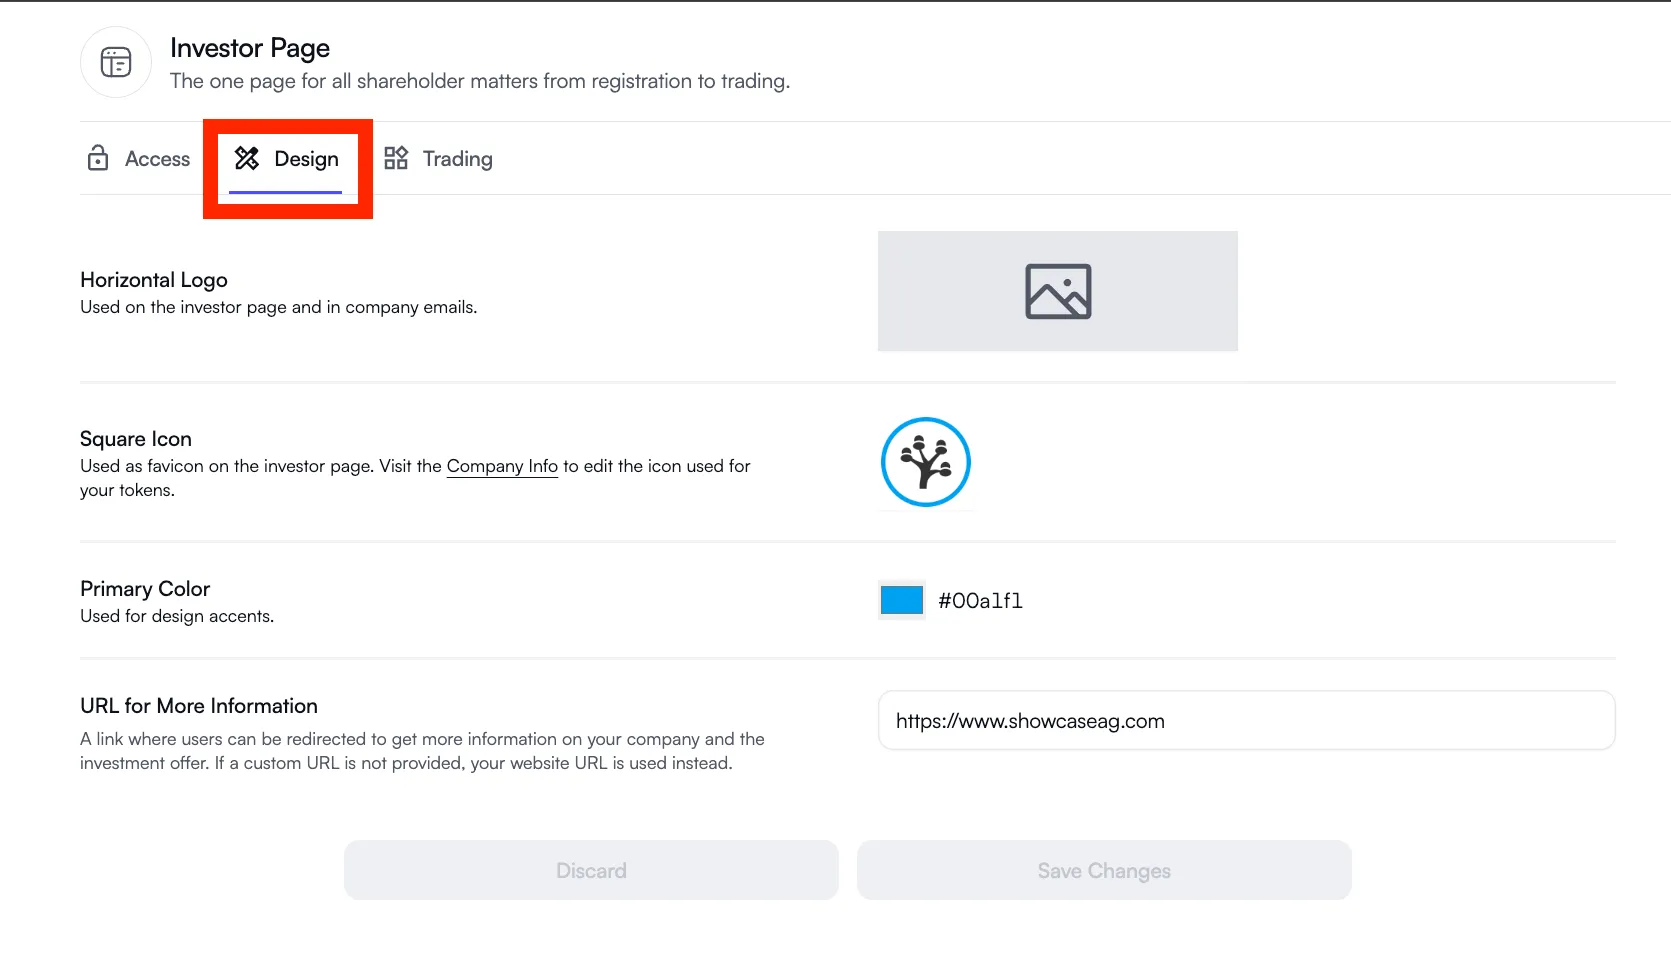
Step 3 — Customize Branding
Section titled “Step 3 — Customize Branding”Upload your logos and select your primary brand color to match your company’s identity.
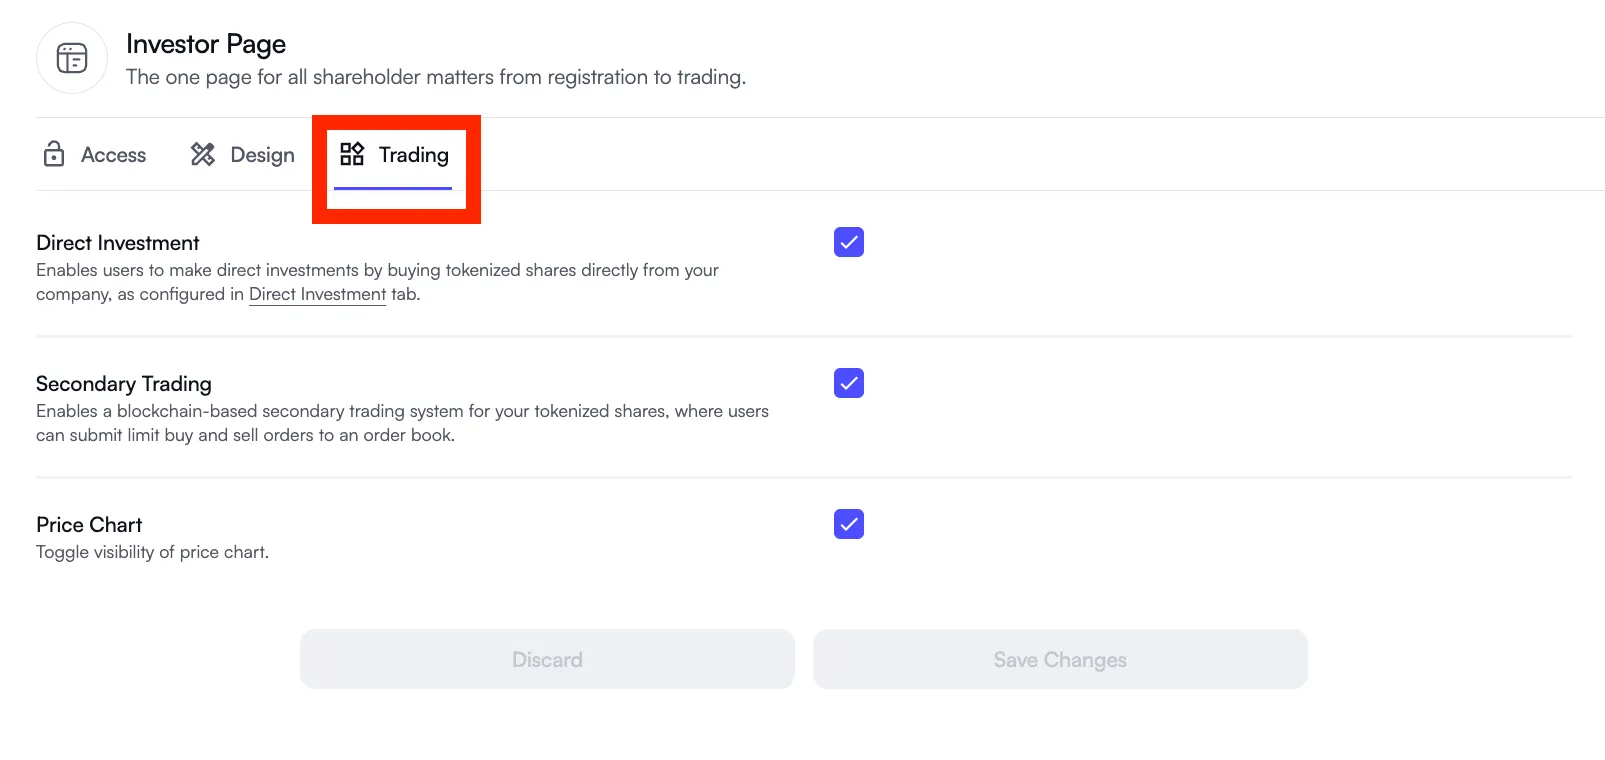
Step 4 — Configure Trading Options
Section titled “Step 4 — Configure Trading Options”In the “Trading” tab, you can enable or disable the following:
- Direct Investment — allow investors to buy newly issued shares directly from the company
- Secondary Trading — allow shareholders to trade shares with each other
- Price Chart — choose whether to display the share price history on your Investor Page